The Liquify filter may be one of the most commonly used filters in Photoshop’s arsenal. The Liquify filter allows us to distort the pixels in a given image without losing quality. Some designers are a bit intimidated by the Liquify filter, others may use in improperly. Today, we will explain the features of this very powerful filter in detail so you can use it in your work.
What is it?
From photo retouching, to artistic effects, the Liquify filter is a powerful tool for every Photoshop user. This filter allows us to push, pull, rotate, reflect, pucker, and bloat the pixels of any image. Today, I will show you the basics of this filter. Grab a bunch of images to practice with and let’s get it started!
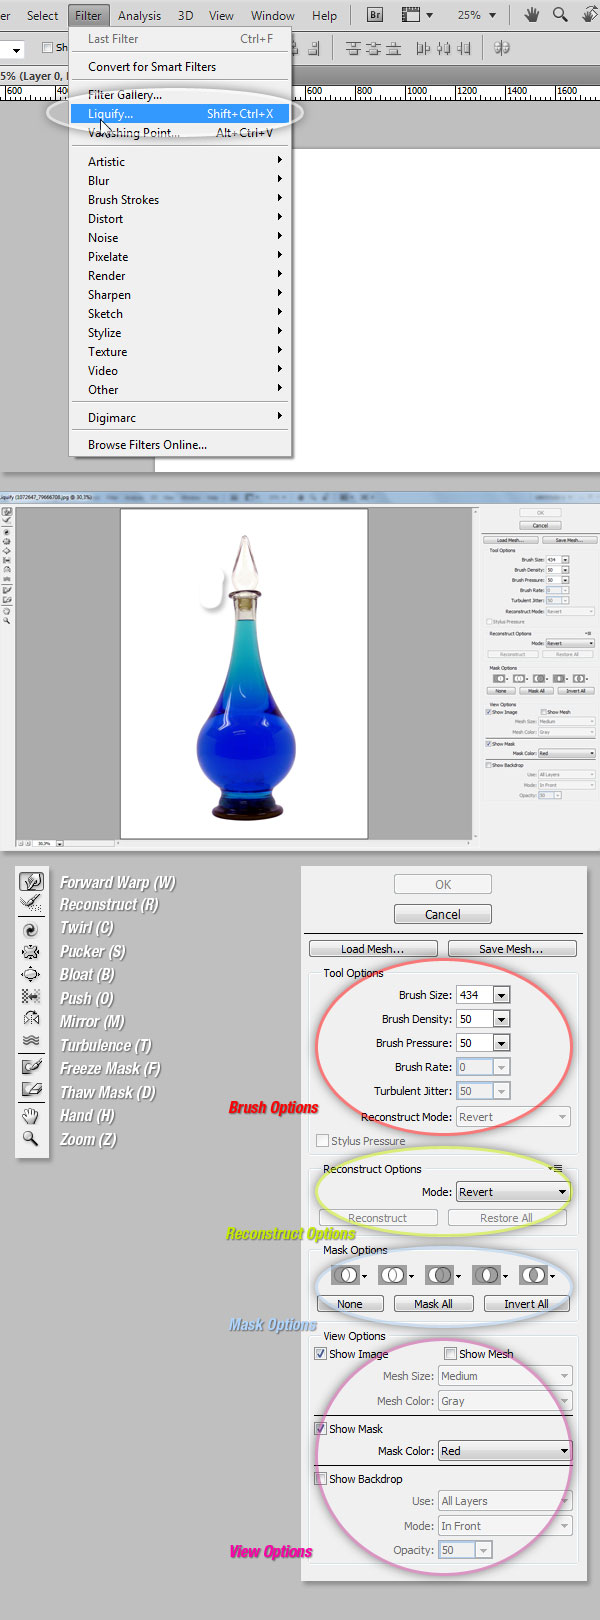
The Liquify filter may be applied to any bitmap Layer but unfortunately cannot be applied to a Smart Object. You can access the Liquify Filter window by clicking Filter > Liquify, or by pressing Shift + Command (Ctrl) + X on your keyboard.
Once the filter is open, you’ll see a window with the following areas:
- Toolbar, located on the left of the screen, there you’ll find the following tools: Forward Warp, Reconstruct, Twirl, Pucker, Bloat, Push, Mirror, Turbulence, Freeze / Thaw Mask, Hand and Zoom.
- The actual image or the object you are editing.
- The Options Panel, where you’ll find the following options: Brush, Reconstruct, Mask and View. Each group of options controls the behavior of the active tool, we will see how to work with those options later on.
Tools
Forward Warp Tool (W)
The most basic tool that you may use is the Forward Warp, basically pushes the pixels of the image forward as you drag. You can control the amount of pixels pushed by changing the brush size in the Brush Options on the right panel. The larger the brush the more pixels will be pushed forward. Once you apply this effect, you must click on the OK button on the right panel to commit the changes.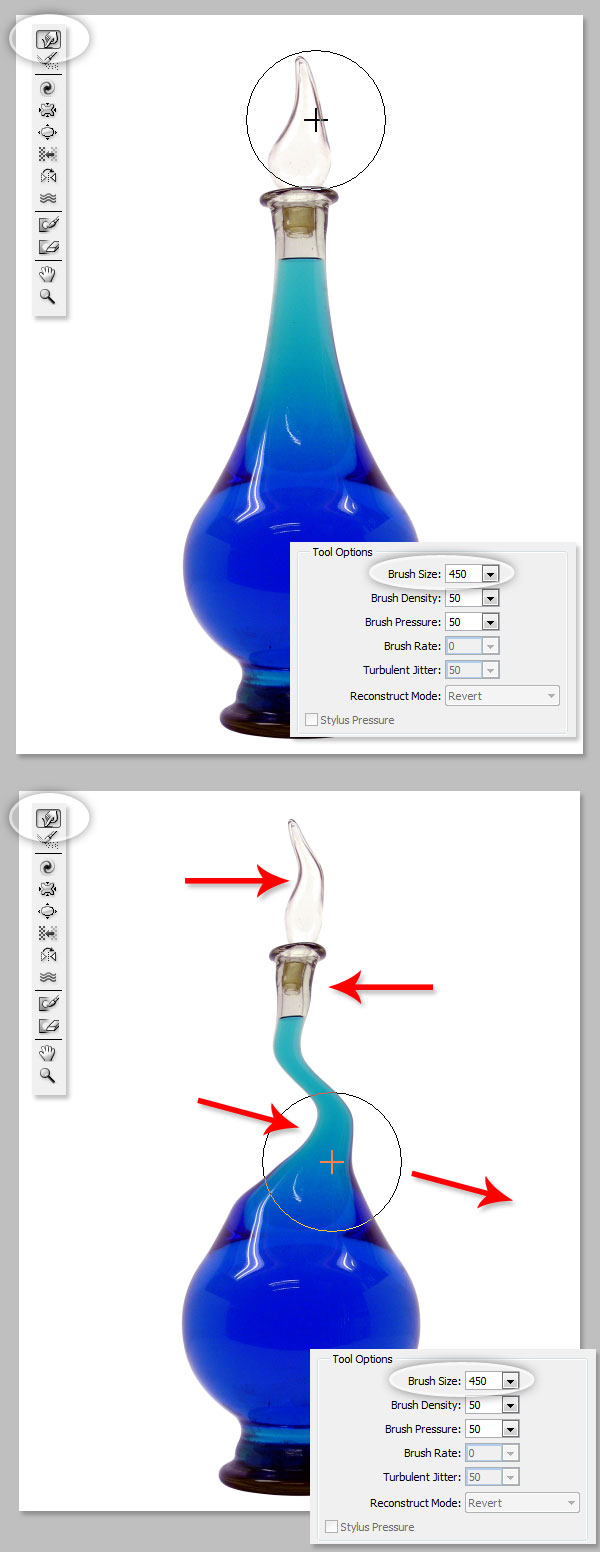
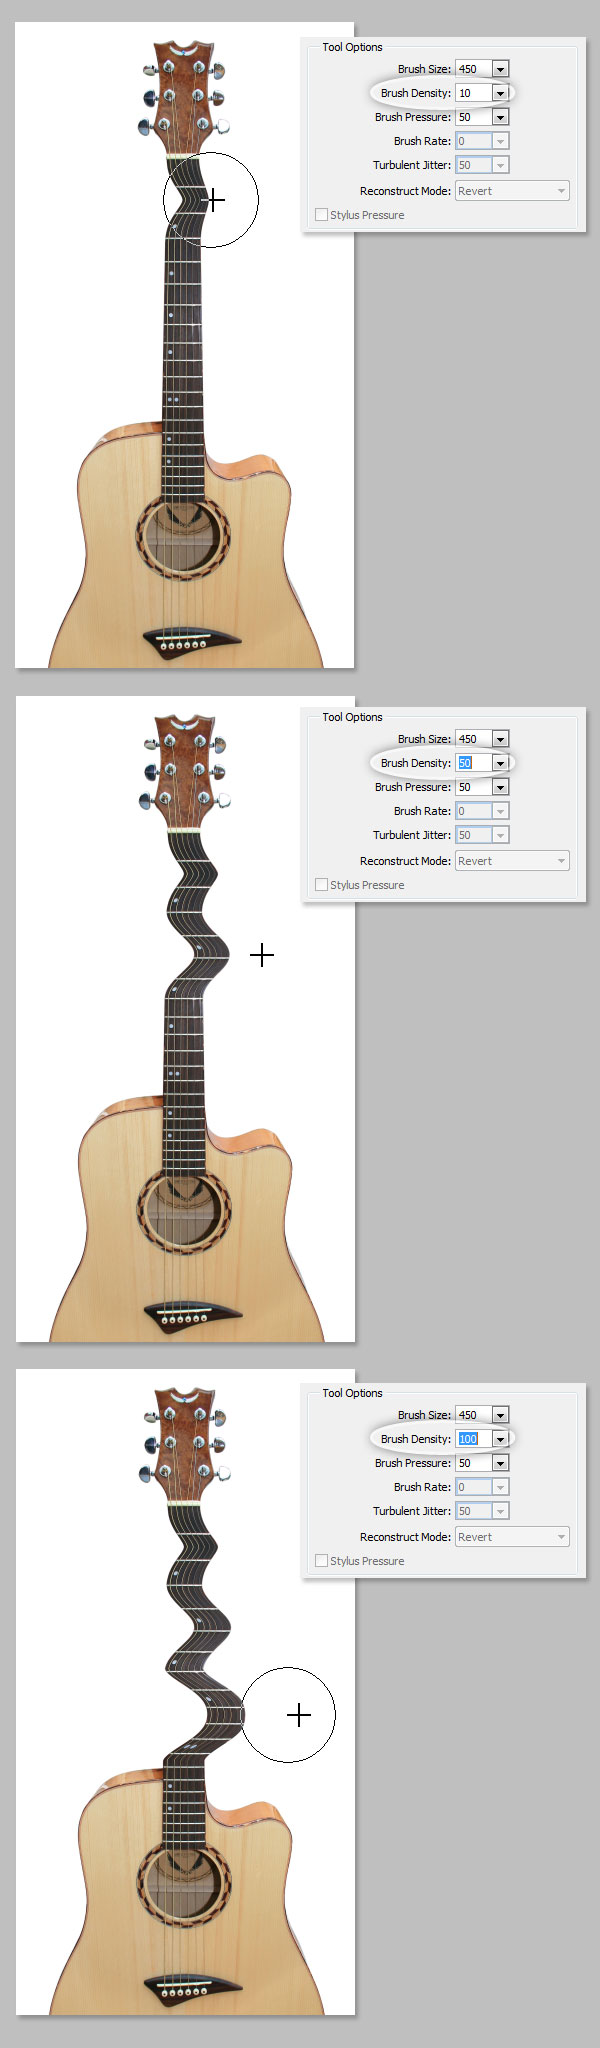
Brush Density
This value controls how a brush feathers on the edge, by default a Liquify effect is stronger in the center of the brush and softer on the edges, you can increase the Brush Density value from 0 to 100. The larger the value, the stronger the effect on the brush tip’s edges.
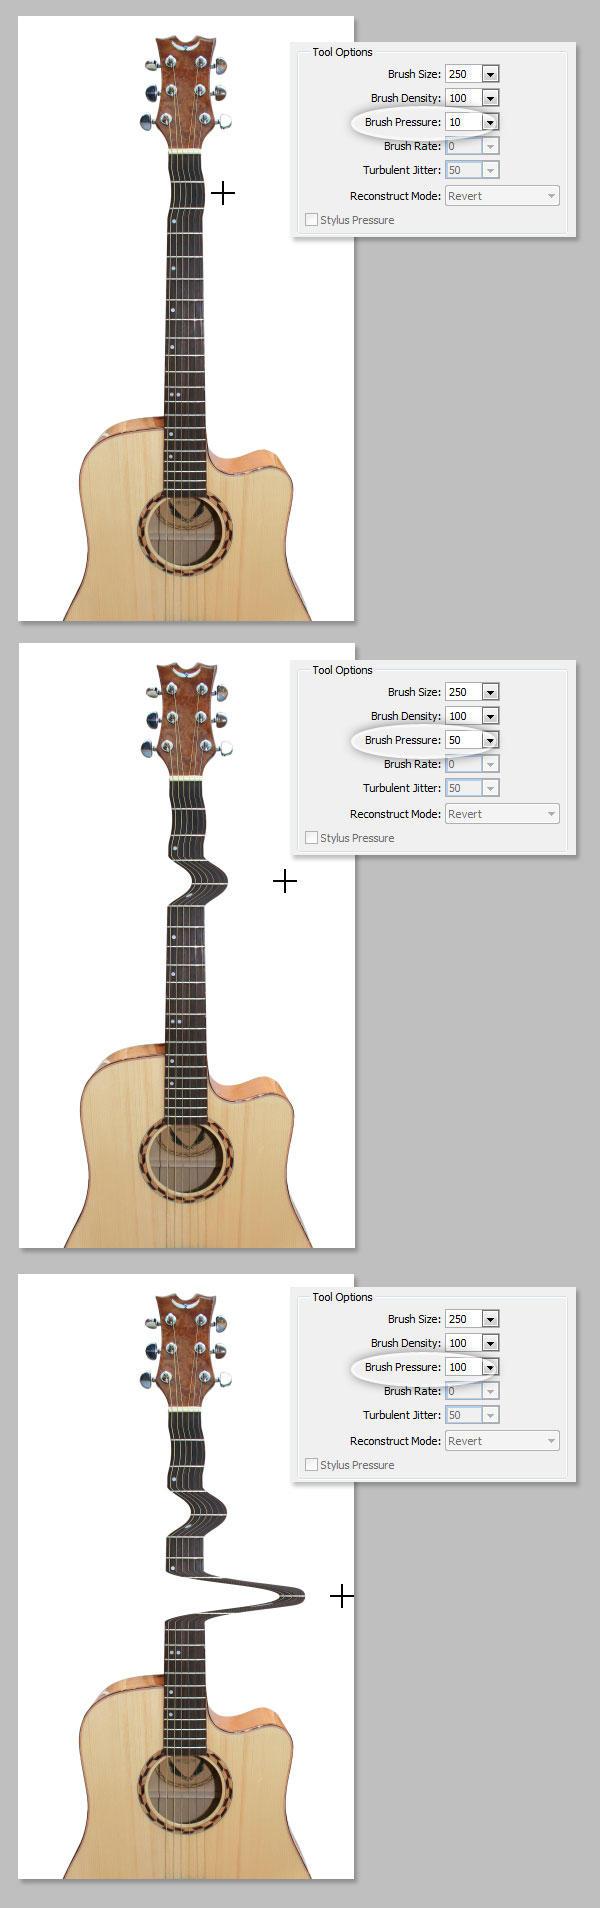
Brush Pressure
This value controls the speed at which distortions are made when you drag the brush. This value can be set from 0 to 100, being 0 the lowest pressure and 100 the highest. Using a low brush pressure makes changes occur more slowly, so it’s easier to stop them at exactly the right moment.
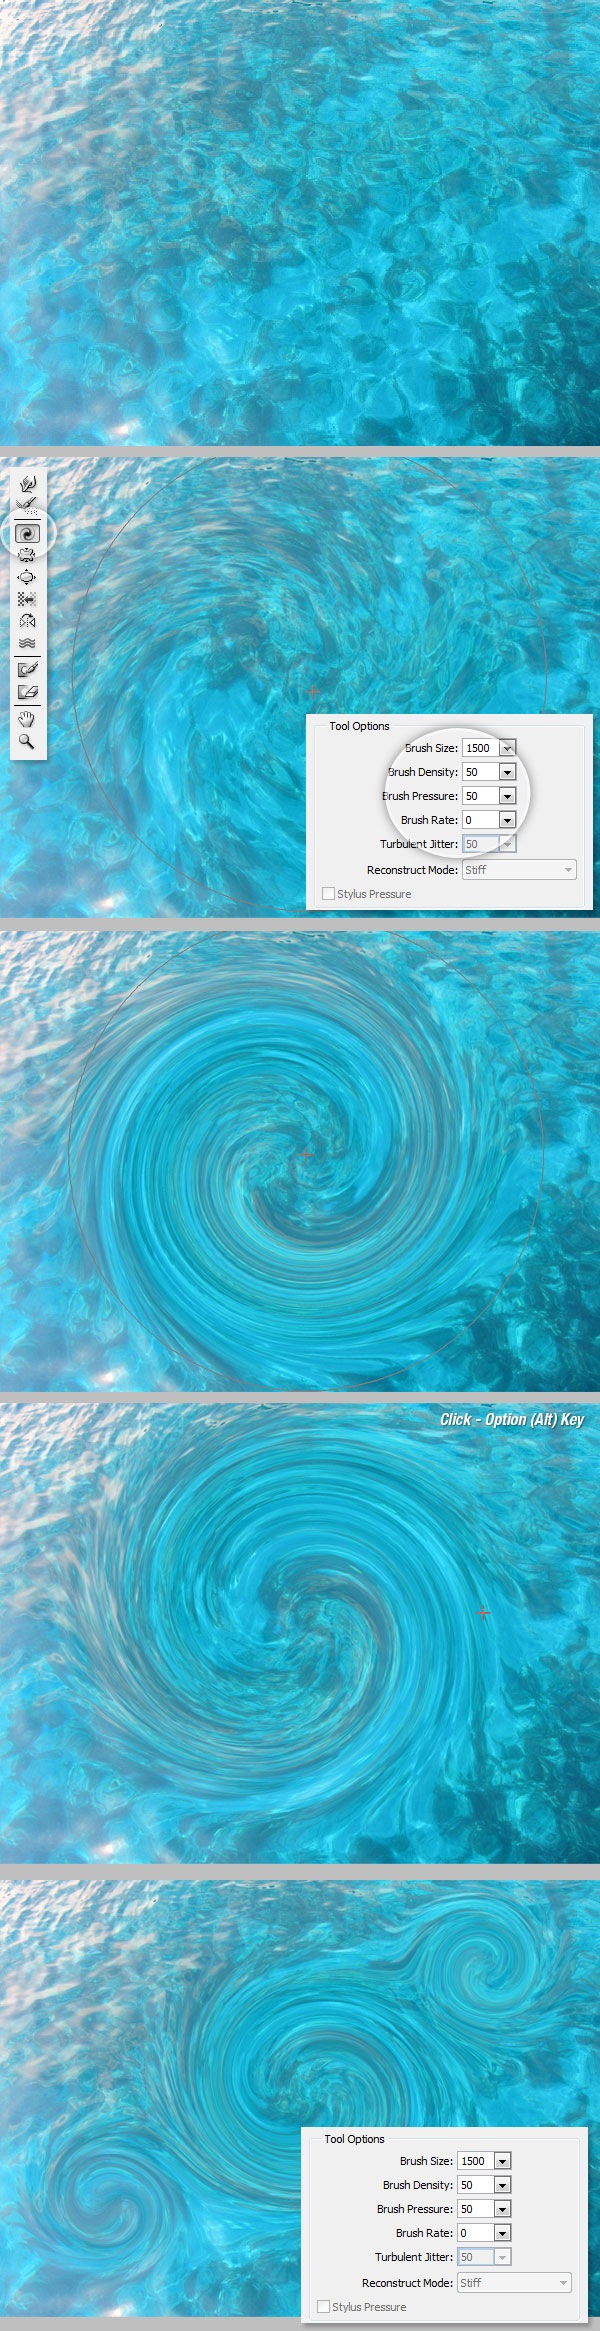
Twirl Tool (C)
This filter rotates pixels clockwise as you click or drag, in order to Twirl pixels counterclockwise, just hold the Option (Alt) key while you’re clicking. The Brush Rate value comes in handy here, it controls the speed which distortion is applied while the mouse is still stationary, the higher the number the faster the effect.
Pucker (S) and Bloat (B) Tools
The Pucker Tool moves pixels towards the center of the brush area and the Bloat Tool moves pixels away from the center as you click or drag on the image. This is pretty useful when you want to inflate or deflate something.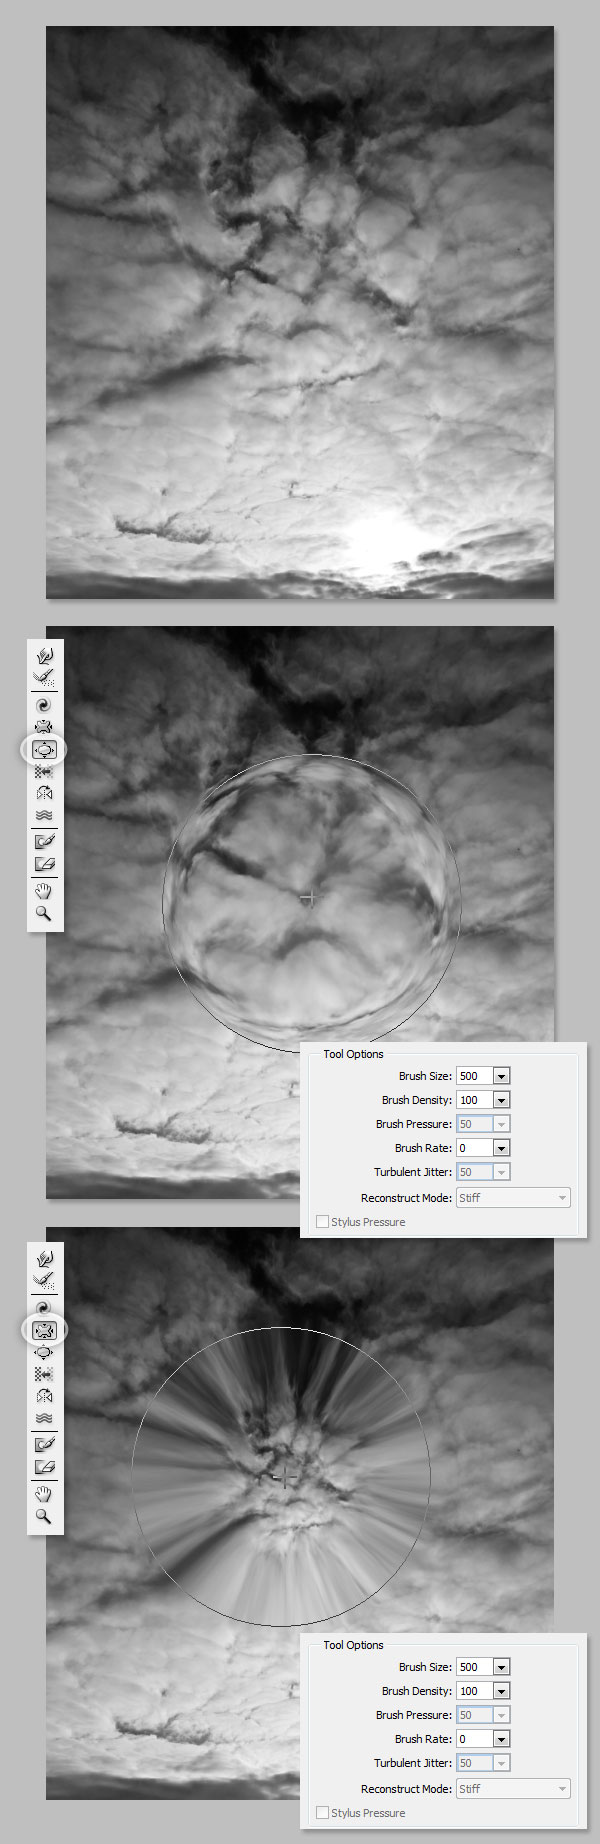
Push Tool (O) Vertical
This tool moves pixels to the left when you drag the tool up and to the right when you drag it down. You can also drag clockwise around an object to increase its size, or drag counterclockwise to decrease its size. To invert the direction (left or right) hold down the Option (Alt) key as you drag.

Push Tool (O) Horizontal
Moves pixels up when you drag the tool left to right, and down if you drag right to left.

Mirror Tool (M)
This tool works exactly like a mirror. The pixels perpendicular to the direction of the stroke will be duplicated depending on the stroke direction the mirror pixels could be below (left – right stroke) or above (right – left). This works much better if you make horizontal or vertical parallel strokes. Hold the Option (Alt) key while drag will invert the reflected pixels’ source to the opposite angle.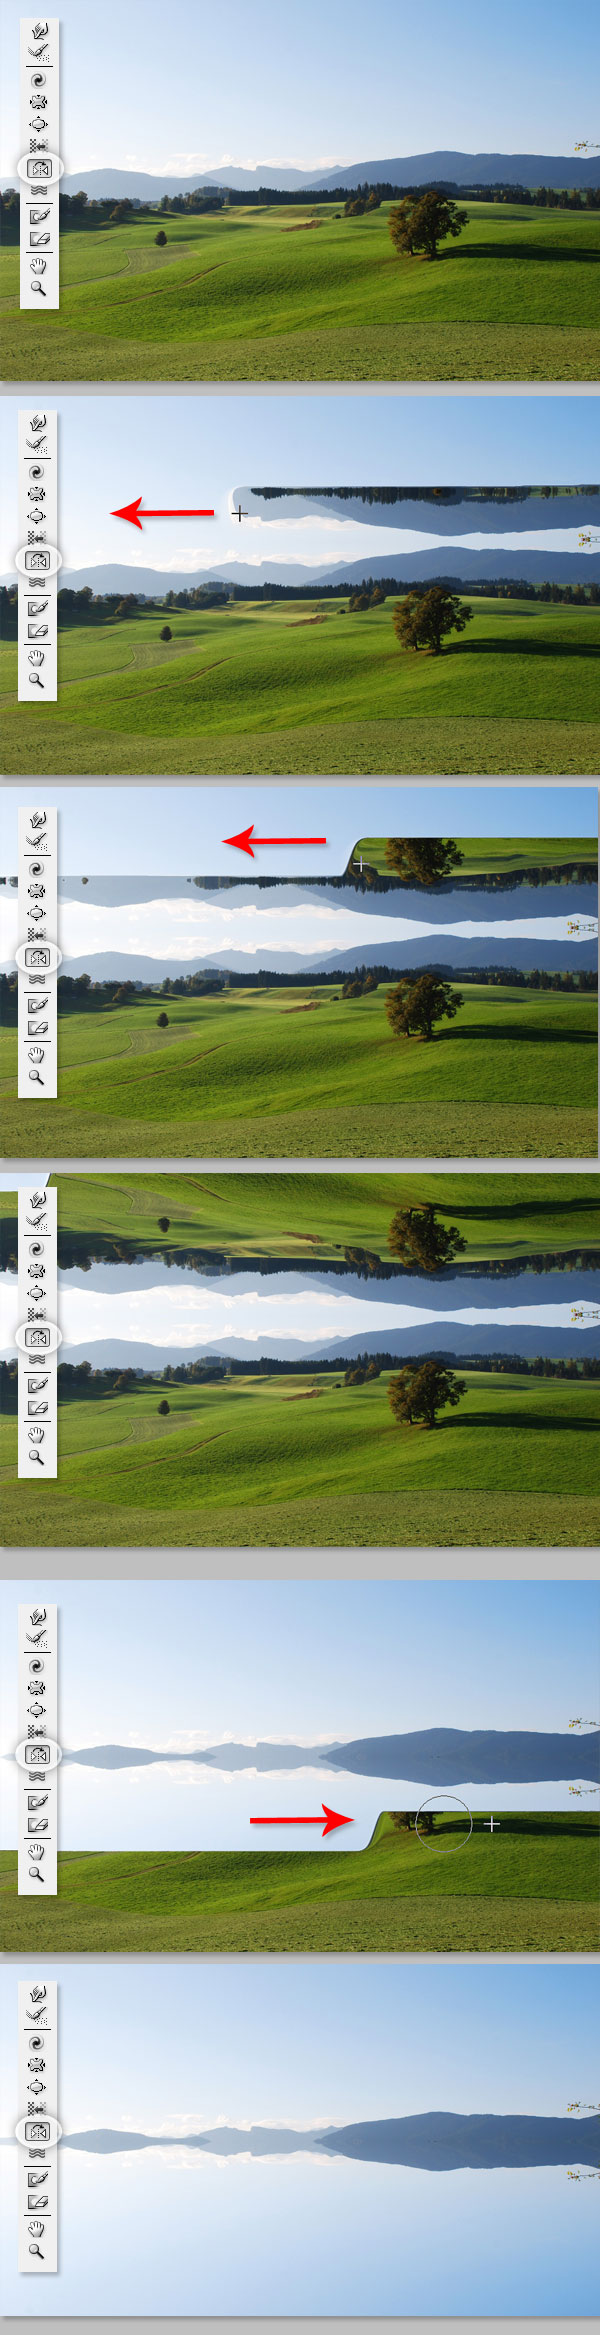
Turbulence (T)
Smoothly scrambles the pixels while dragging. With this tool you might find the Turbulent Jitter value very handy; a high number here means a lot of turbulence.

Masks – Freeze and Thaw Masks
You can protect some areas of the image from changes by using a Freeze Mask. In the Tool bar, click on the Freeze Mask button and paint the areas you want to keep unchanged. The Thaw mask works just like a mask eraser. Use this tool like the other Liquify tools; you can control the brush’s Size, Density and Pressure. After Masking an area and applying it, the masked area will remain unchanged.
Mask Options
The mask Options panel, at the right side of the Liquify window allow you to choose Selection, Layer Mask, Transparency, or Quick Mask to create masks on the image.
You can also edit previously created masks as well by choosing Replace, Add, Subtract, Intersect or Invert.

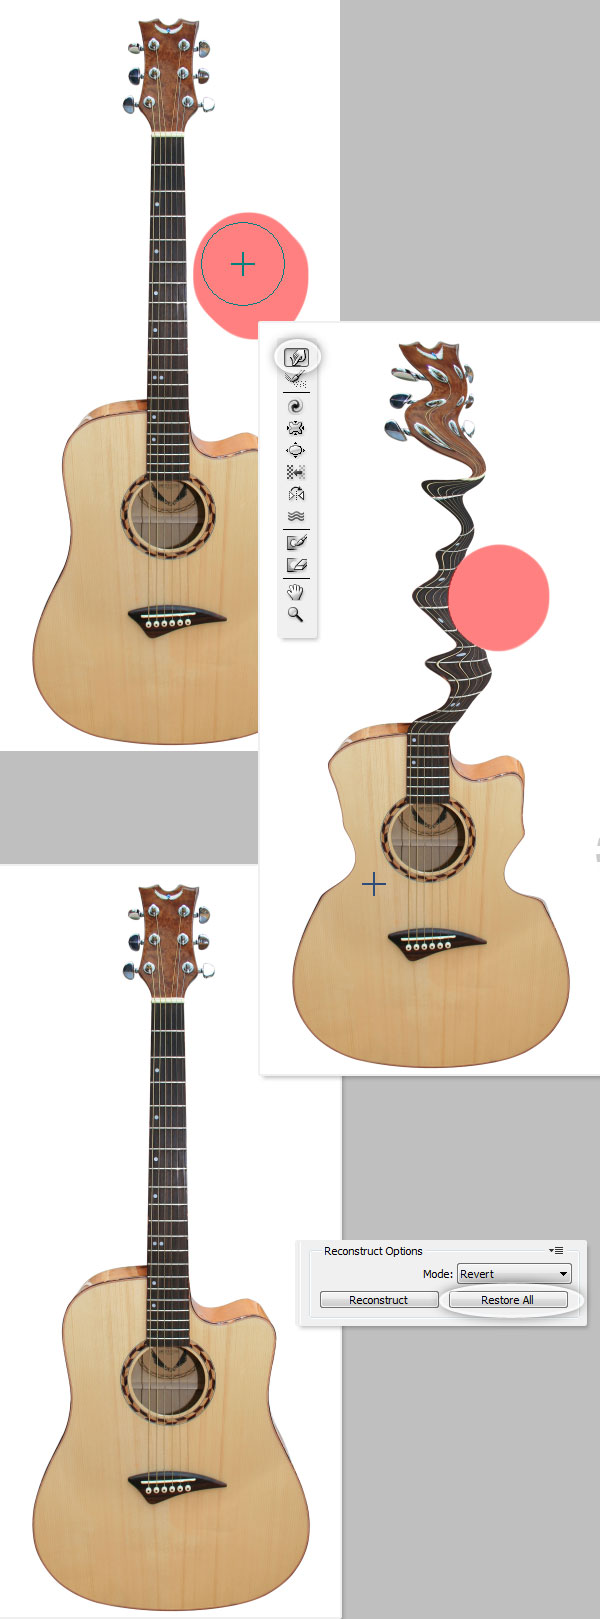
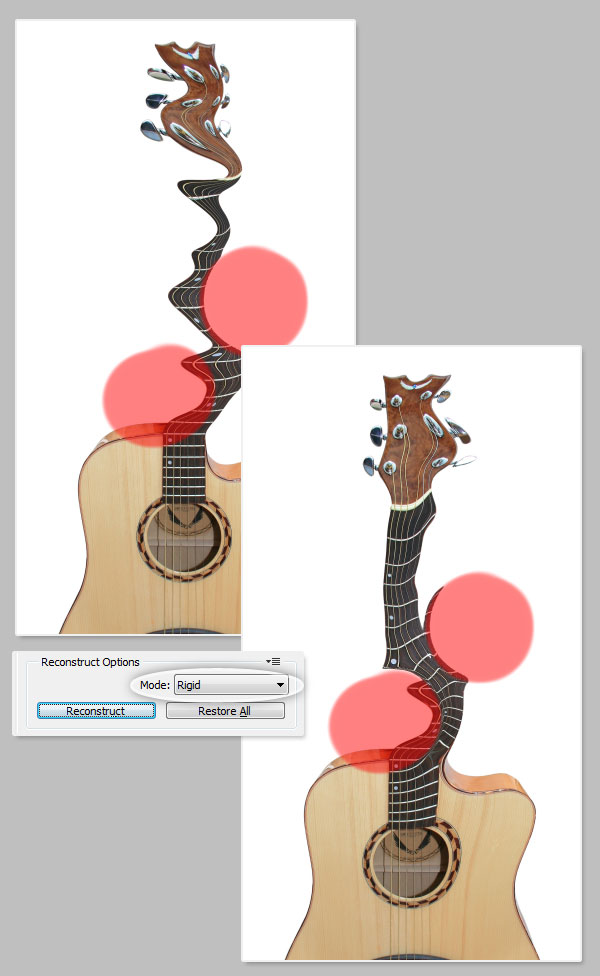
Reconstruct All
After distorting, you may need to reconstruct some areas here and there. There are many creative ways to reconstruct the distortions with the Liquify filter. The simplest way to do this is by clicking the Restore All Button on the Reconstruct Options Panel.
Reconstruct Tool and Reconstruct Options
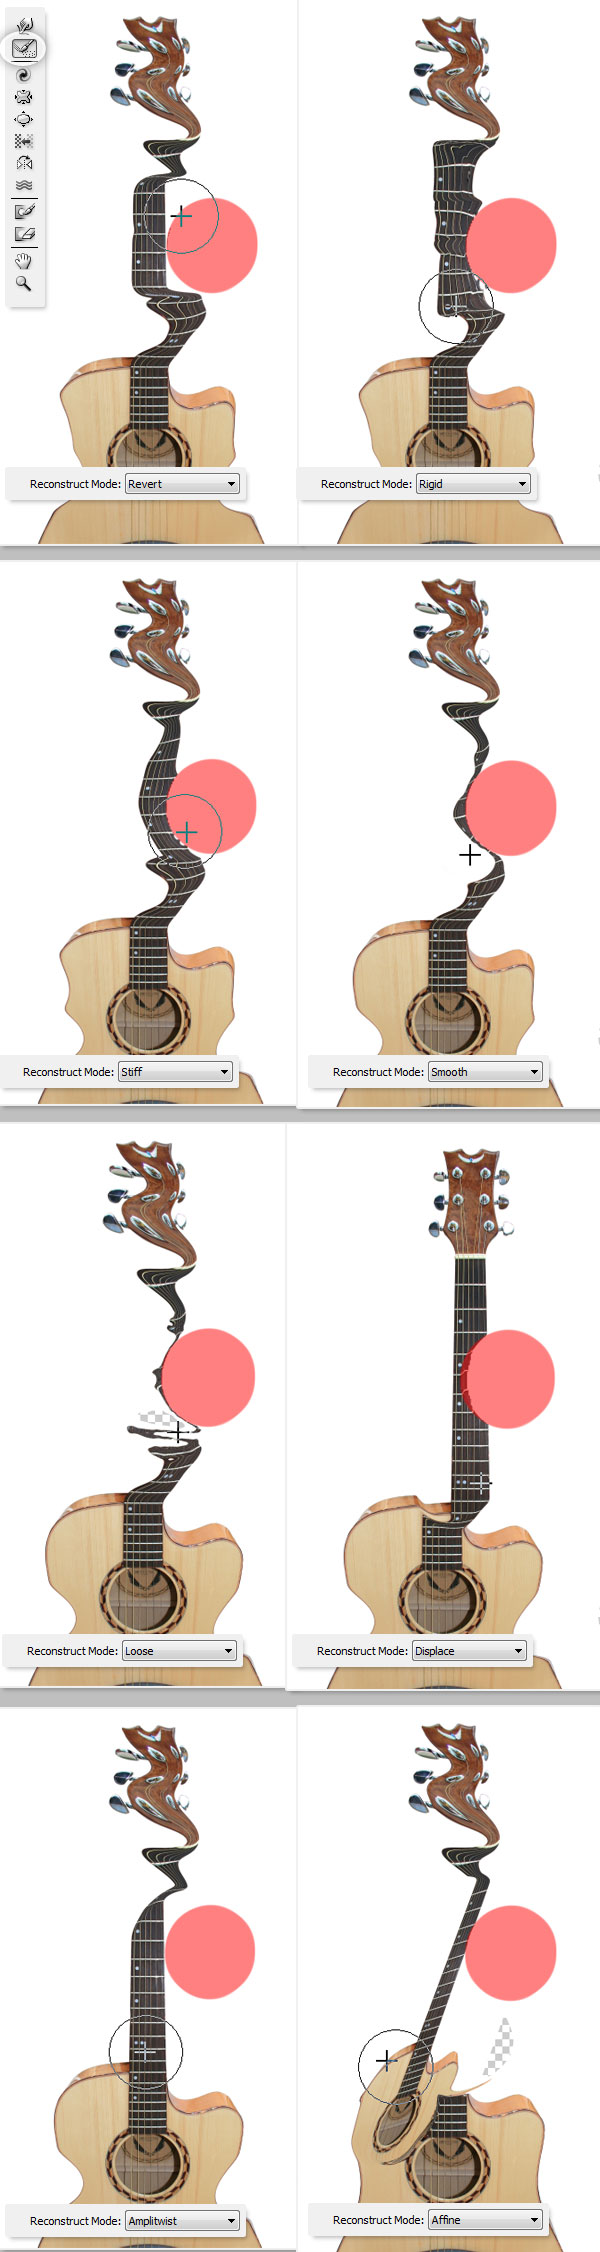
Auto Reconstruct
On the Reconstruct Options Panel, there’s a button labeled Reconstruct. By pressing it you can auto reconstruct the image using one of the options on the list.
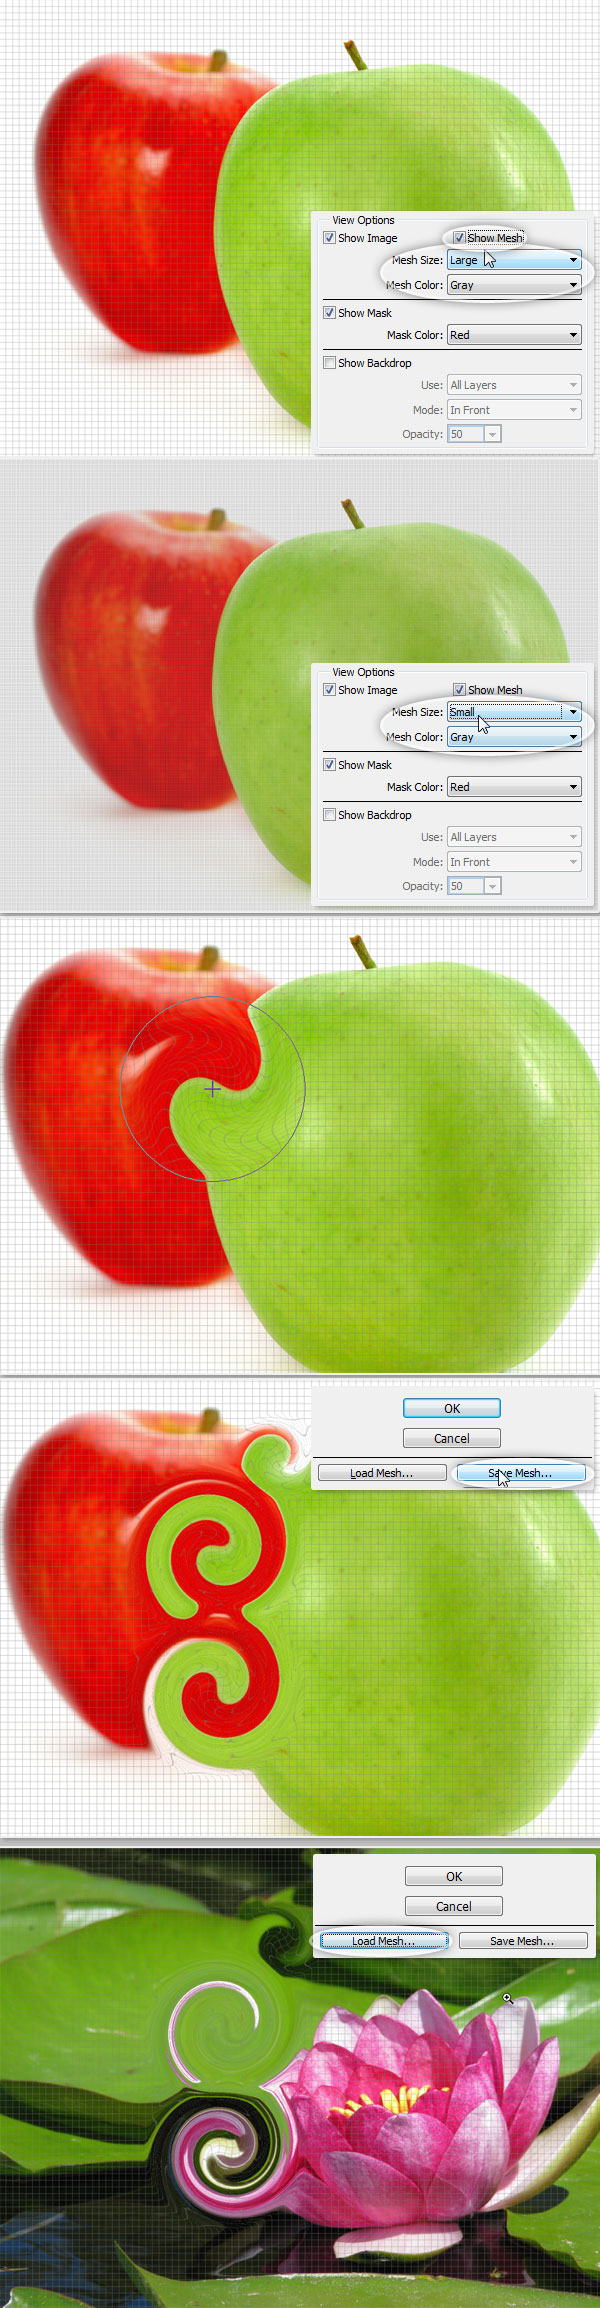
View Mesh and Masks
The Mesh is a bi-dimensional grid than can be shown or hidden in the View Options Panel. You can increase or decrease the Mesh Size, and change its color. The Mesh and Masks can be shown or hidden from this panel and its color can be changed.Every distortion made with any of the previously mentioned tools can be saved as a Mesh, to do this, click on the Save Mesh button in the Options Panel. A saved Mesh can be opened and be re-applied to any other image by clicking on the Load Mesh button.
Backdrops
Backdrops show additional layers aside from the Layer actually being edited. In a multiple layer document, chose the layer you want to distort and open the Liquify Filter Window. On the View Options Panel check the Show Backdrop checkbox to show the additional layers in the document. You can easily show or hide them, or change its opacity.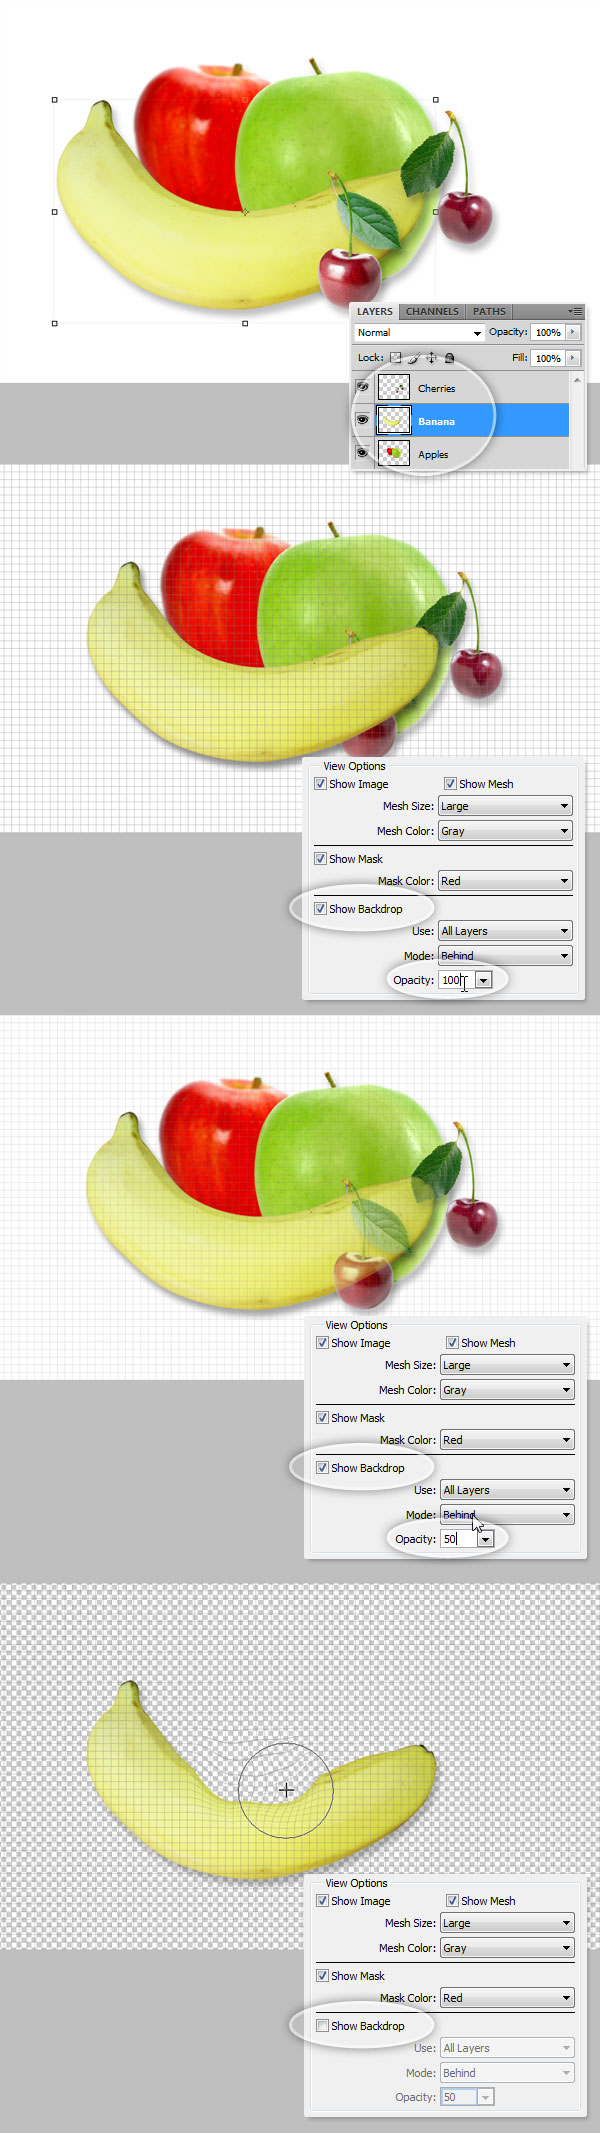
More on Backdrops
You can chose the layer being shown as a backdrop or even select all the layers as well. In addition, you can control the position of the backdrops, bring them to the front, or leave them behind the active object in the Mode option.Only the active layer is distorted, the backdrop layers are only for visual aid.

Alternative to Plastic Surgery
The Forward Warp Tool can be easily used to fix imperfections on any photograph. In the following example, we use two brush sizes to transform this girl’s nose and chin, and even make her smile just a little bit.
But remember, with great power comes great responsibility. You can fix almost anything in a picture with this tool but try to be ethical in your approach.

Conclusion
The Liquify tool is one of Photoshop’s most beloved features and it is an important tool to learn and master. Hopefully, you found this guide useful and will use it to help you in future projects.