Step 1:
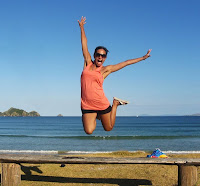
So here’s our photo. It’s a great shot from iStockPhoto of someone tearing up a wave. Even without any Photoshopping it’s already looking pretty good, but it lacks oomph.

Step 2:
Our first step is to up the contrast, you can do this by going to Image > Adjustments > Brightness/Contrast. I’ve upped the contrast by 20 and upped the brightness to stop the photo from getting too dark.

Step 3:
Next we duplicate the layer and press Shift-Ctrl-U to desaturate the copy to Black and White.

Step 4:
Set the Black and White layer to Overlay and 60%. This gives us a nicely adjusted photo.

Step 5:
Now with a large, soft brush, create a new layer and paint some black on the edges as shown. When you’re done, set that layer to Overlay and 50% or thereabouts. We do this just to make the center of the image have a slightly higher contrast to the edges, which helps make it pop.

Step 6:
Now with this method, you should be adjusting to compensate for your specific image. In this photo of the surfer, there is some extra noise in the bottom left. I think they are bubbles or wash or something, it’s not important, to us they are just unwanted noise. So with a large, fat, black brush gently paint over that area. Having some parts of the photo be quite flat and clear makes the other parts seem more visually interesting, so this again helps give the photo more punch.

Step 7:
Now the coloring of the image is quite bright, so we create a new layer on top, fill it with black, and set the blending mode to Color. Then we change the Opacity to just 30%, this effectively desaturates the image a little, but by adjusting opacity we can control this easily and without doing anything permanent.

Step 8:
Now we could stop here, but I want to get some greenish ocean colors in there too. For this purpose I downloaded an image from Arsenal’s Freebie Section under Watercolors. It has a perfect ocean-y color pallet and some texture to boot. So we paste this into a layer above all the others and set it to Color Burn and 20%. I wish I had some good explanation of why I used Color Burn, but the truth is I just played around with all the blending modes until I found one that looked nice!

Step 9:
And here’s our finished image!
Now with a technique like this, remember to use judgment as to how far to go with the photo. In this case I’ve gone pretty far because its a tutorial, but you could always tone this back by copying the original photo on top and setting it to say 30% Opacity so that it mixes in with the Photoshopped version.


