Tutorial Details
- Program: Adobe Photoshop CS3+
- Difficulty: Beginner
- Estimated Completion Time: 30 - 40 Minutes
In this quick tip tutorial, we will demonstrate how to create a cool ‘carbon cut-out’ effect using mesh and carbon textures made from scratch. Let’s get started!
Step 1: Creating the Mesh Pattern
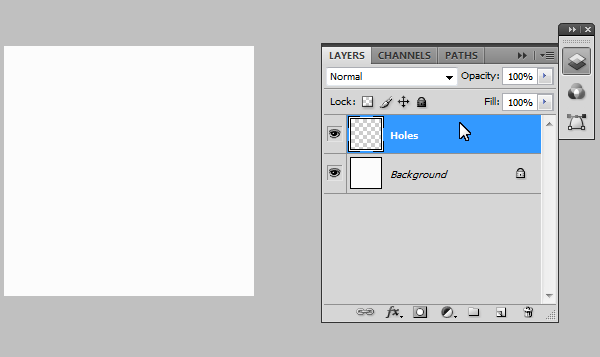
Create a new document, 50×50px and name it "Holes". Fill the background in with #FCFCFC.
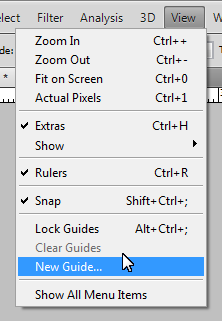
Step 2: Alignment
Now we need to make a grid to help us layout the holes for the mesh pattern, so we need to create precise guides by going to: View > New Guide. And make the following separate guides:
- Vertical: 12px, 25px and 38px
- Horizontal: 9px, 17px, 25px, 33px and 41px

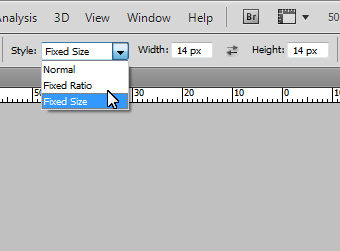
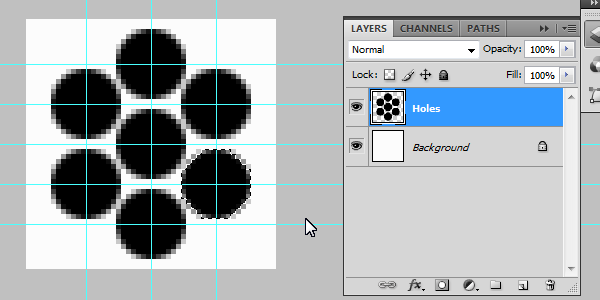
Step 3: Adding the Holes
Using the Elliptical Marquee tool (M), set the selection style to "Fixed Size" and enter 14px for width and height. Alt/Option + Click on the cross sections highlighted on the image below. This should create a perfectly centered eclipse around the cross in which we will fill in black (#000000). Repeat for the remaining points.
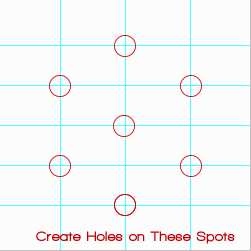
Should look something like this:
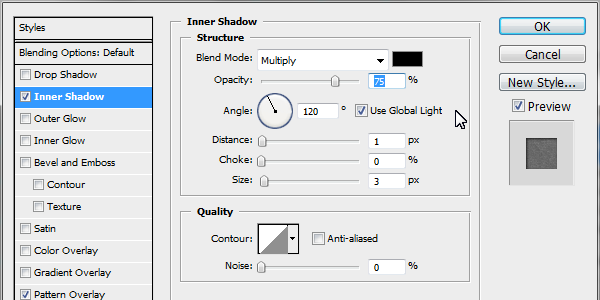
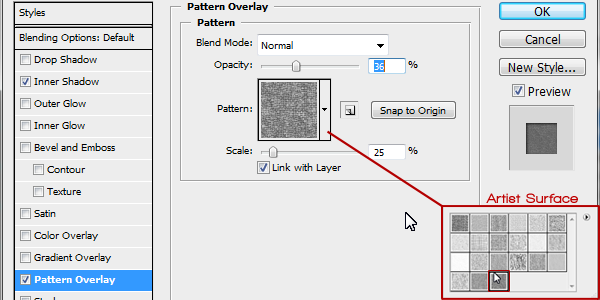
Step 4: Adding Detail
Add the following layer styles: (Inner Shadow: Black, with Distance set to 1 and Size set to 3.
Pattern Overlay: Pattern selected from Photoshop’s default ‘Artist Surface Pack’ called ‘Oil Pastel on Canvas’ , set opacity to 36%.
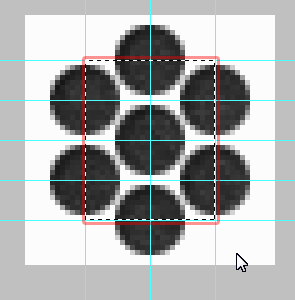
Step 5: Saving the Pattern
Using the Rectangle Marquee tool (M) select the inner rectangle (as seen in the image). With it selected go to: Edit > Define Pattern (You may need to expand the menu, by clicking on "Show All Menu Items"). Call it "Mesh" and press Ok.

Step 6: Creating the Carbon Pattern
Create a new document, 100×100px in size. Create a new layer (Cmd + Shift + N) and call it "Vertical Tile." Using the Rectangle Marquee tool (M) set the selection style to "Fixed Size" Using 25px for width and 50px for height. Make a selection in the very upper left hand corner and fill it in black (#000000) for the vertical tiles.


Add the following layer styles: Color Overlay: with the color set to: #252627.

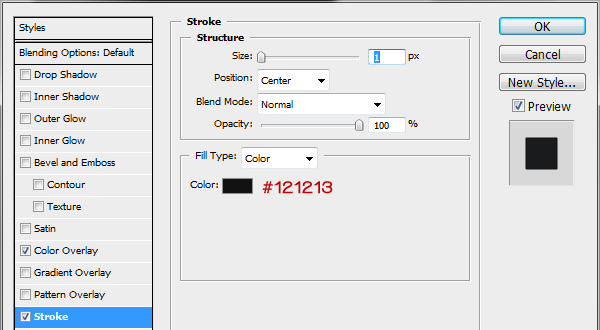
Stroke: with the color set to: #121213, size on 1 and position set to: Center.
Step 7: Horizontal Tiles
We need to now create the template for the horizontal tiles, so create a new layer (Cmd + Shift + N) and call it "Horizontal Tile". Using the Rectangle Marquee tool (M) change the "Fixed Size" to 50px for width and 25px for height. Click right next to the vertical and make the selection flush in the upper right hand corner (as seen in the image below). Fill it in with black.


Add the following layer styles: Color Overlay: with the color set to: #1a1b1c.

Stroke: with the color set to: #121213, size on 1 and position set to: Center.
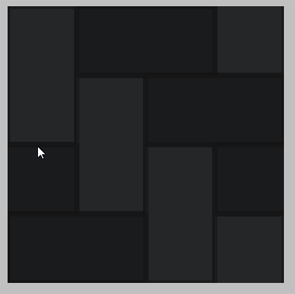
Step 8: Repeating the Pattern
We have the templates for both the horizontal and verticals tiles; by duplicating the layers (Select layer > Cmd + J to duplicate) we now have copies in which we can arrange in a pattern (Pattern template below) Making sure they are flush and not leave gaps (As this will affect the final outcome of the image). Repeat duplicating and ordering the layers to get the finish pattern (as seen below).

Step 9: Saving the Pattern
Again using the Rectangle Marquee tool (M) select the whole document (or Cmd + A). With it selected go to: Edit > Define Pattern (You may need to expand the menu, by clicking on "Show All Menu Items"). Call it "Carbon" and press Ok.
Step 10: Putting it All Together
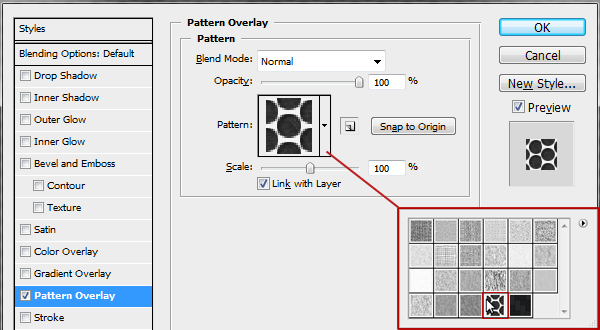
Create a new document to what size suits you (I will use 1000×700px for demonstration purposes). Create a new layer (Cmd + Shift + N) and call it "Mesh", fill it in with black (#000000). Apply the Mesh pattern we made previously via layer styles (as seen below).
Pattern Overlay: The patterns we made are saved in the last pack you selected, so in our case the Artist Surface was our last. Select the Mesh pattern from the pack.
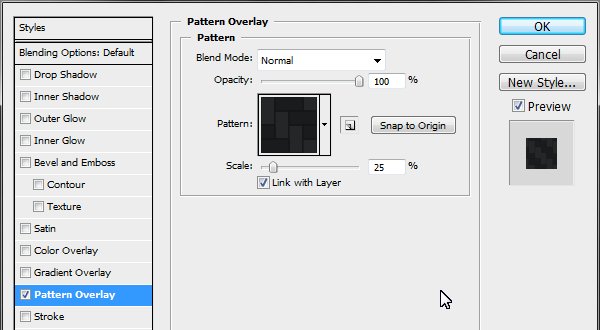
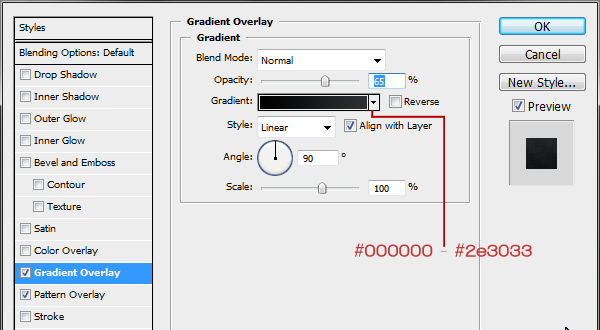
Create a new layer (Cmd + Shift + N) on top and call it "Carbon" and fill it in with black (#000000), apply the Carbon pattern we made previously via layer styles (as seen below).
Pattern Overlay: Select the carbon pattern in the same folder, and drop the scale down to 25%.
Gradient Overlay: Starting color #000000 to #2e3033, drop opacity down to 65%.
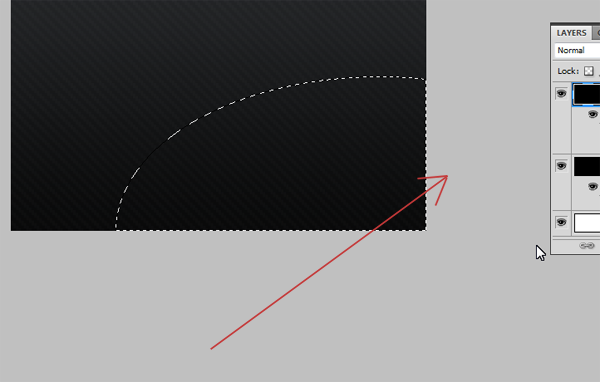
Step 11: “Cutting out” the carbon
Select the Carbon layer and again using the Elliptical Marquee tool (M); making sure the selection style is back to "Normal" make a rough oval selection from the middle most bottom of the document to the centre right portion. Press delete to remove that portion to reveal the mesh layer beneath, deselect the selection (Cmd + D).
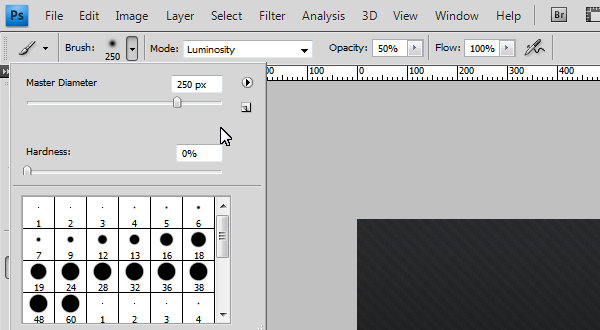
Step 12: Adding Highlights and Shadows
Create a new layer (Cmd + Shift + N) between the Carbon and Mesh layer and call it "Carbon Shadow." Using a large soft brush (200-300px) with its hardness turned down to 0, opacity to 50% and color set to black (#000000), start to draw along the "cut-out". Use a technique of overlapping brush strokes to build up the shadow under the lip of the carbon, and to fade out towards the center of the uncovered mesh.
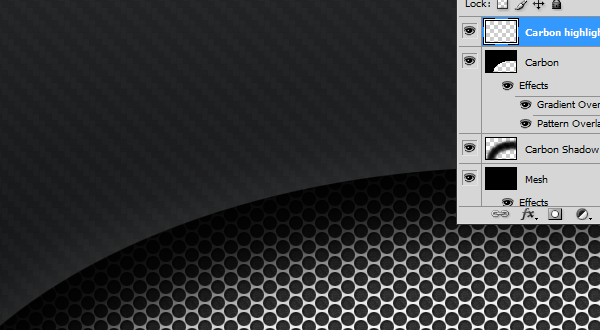
To add extra detail we can create a very slight highlight on top of the carbon to give it the effect of catching the light source. Create a new layer (Cmd + Shift + N) on top of the Carbon layer and call it "Carbon Highlight" Using the same brush but using white (#FFFFFF) instead of black, Cmd + Click the Carbon layer, to load the selection and keep our highlight in. Now start to paint across the lip very softly to create that soft highlight, turn down the opacity down to 25%.
Final Image
You’re Finished, I hope you enjoyed the tutorial!